
2.6K

Ingredients:


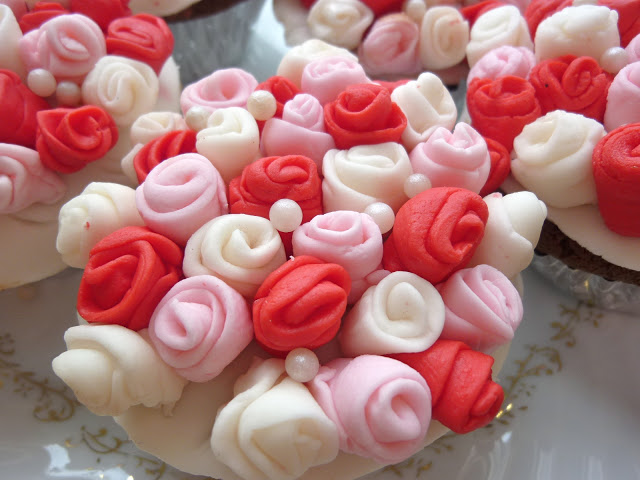
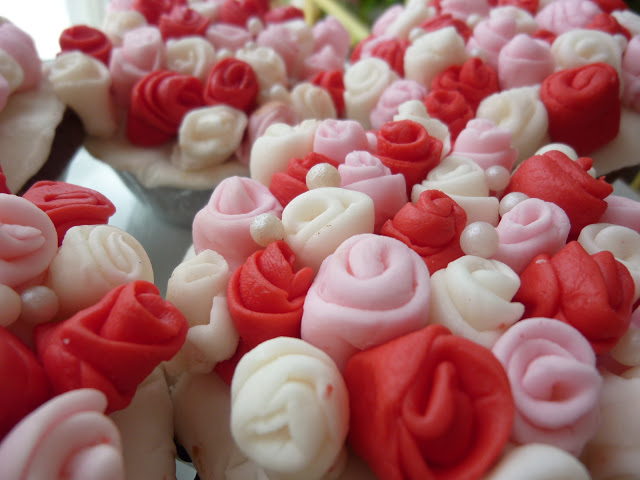
I admit, I must have been a little mad to create these labor intensive cupcakes. As I was rolling up what seemed to be thousands of fondant rosebuds, I did seriously question my sanity. I didn’t even know if the idea would work. I imagined myself chasing rolling rosebuds all over the kitchen floor as they fell off the cupcakes while trying to secure them into place.

But they eventually came together and I was more than pleased with the result.
If you have A lot of time on your hands and, like me are crazy enough to make them. Here’s how I did it. I apologize for the lack of photographs for the step by step. I was bleary eyed and simply forgot to document the process
Rosebud Bouquet Chocolate Cupcakes
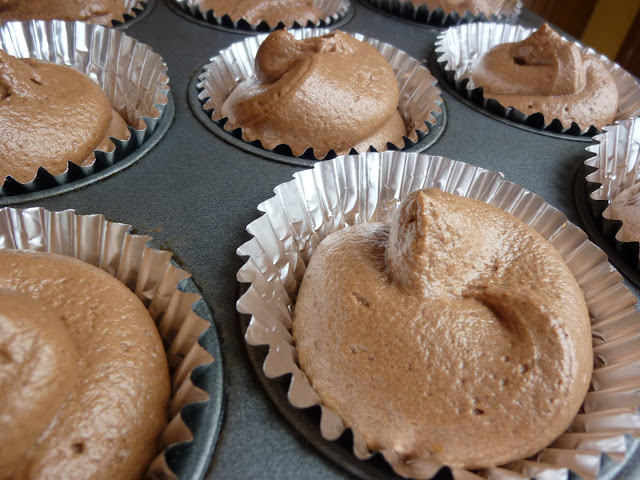
For the cupcakes:
You can use any flavor cupcake or frosting you like. I used Magnolia Bakery’s recipes for both the chocolate cupcakes and chocolate buttercream.
Those recipes can be found HERE and HERE (scroll down)

which ever one you choose, half or quarter the cupcake frosting recipe as you will not be piping lovely swirls on your cupcakes. You will need just enough to spread a thin layer on top of each.
For the Fondant: You can buy pre colored store bought versions but I like to make and color my own marshmallow fondant.
Ingredients:
- 1/2 bag (1/2 pound) marshmallows (minis melt easier but you can use regular sized ones as well.)
- 2 tablespoons of water
- 1 pound of powdered sugar
- Crisco or shortening
- plastic wrap or cling film
Directions:
- Cover the inside of a heat safe bowl and a wooden spoon with Crisco or shortening.
- Place marshmallows and water in the bowl.
- Microwave the marshmallows for 30 seconds at a time stirring the mixture in between with the wooden spoon.
- When the mixture is the consistency of Marshmallow Fluff, stir in 3/4 of the powdered sugar one cup at a time.
- Cover your work surface with powdered sugar and cover your hands with Crisco or shortening.
- Dump the fondant on the sugared surface and knead the rest of the sugar in.
- Separate the fondant into different parts and color as desired. When coloring, add a bit of gel color at a time with a toothpick and knead in until the color is evenly distributed and you get the color you want.
- Wrap each piece in plastic wrap until you use it.
- Wrap leftover fondant tightly in plastic cling film and store in a zip lock bag.
Assemble and Decorate:
You will need:
- Baked cupcakes
- Cupcake frosting covered in plastic wrap
- Tracing or white sheet of paper
- A stiff piece of paper or thin cardboard
- Pencil
- Scissors
- Fondant in colors of your choosing
- Small sharp knife
- Plastic wrap or cling film
- 1 tablespoon shortening or Crisco
- Small Paint brush
- Small spatula
- Edible pearls (optional)
Directions:
- Take the tracing or piece of white paper, lay it on top of the cupcake pan you used to make the cupcakes and trace one circle with a pencil.
- Glue the paper onto a stiff piece of paper or thin cardboard and cut out the circle.
- Roll out the white fondant or the color you want to use for the base and using the cardboard circle cut out enough circles from the fondant to cover your cupcakes. Wrap these individually in plastic wrap and set aside.
- Take one color of the fondant you would like to use for the rosebuds and roll it out into a long strip.
- Cut the fondant into long thin strips. Wrap these individually in plastic wrap and set aside.
- Repeat with all your fondant colors you wish to make rosebuds out of.
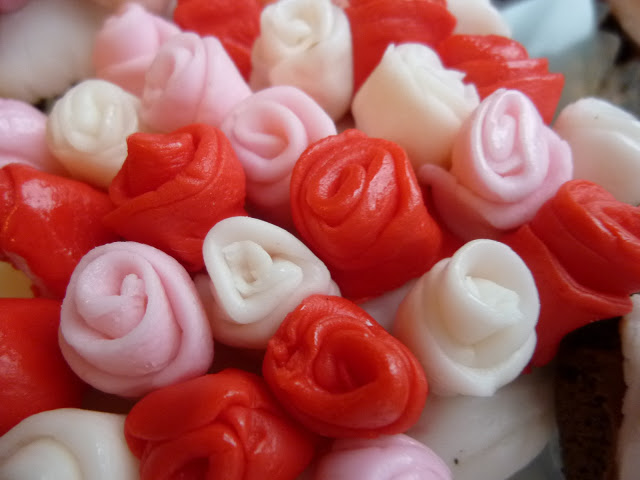
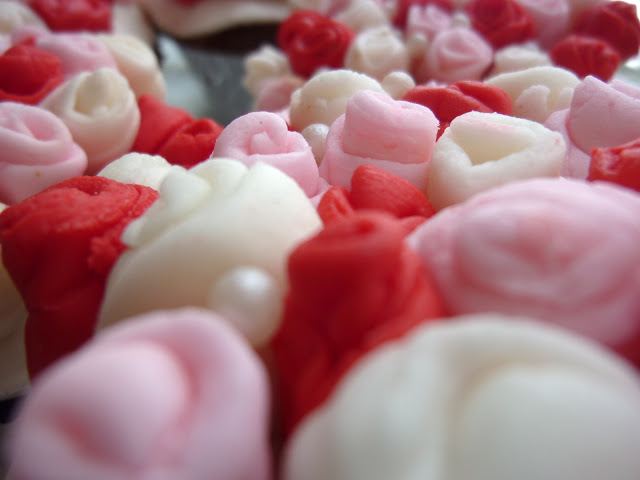
- Unwrap one of the strips at a time, cut into 3/4 inch pieces and roll up starting with folding over one end and wrapping the rest around the end. Repeat until you have 8 rosebuds.
- Repeat with two other colors until you have about 24 rosebuds. Enough for one cupcake (insert insanity here.)
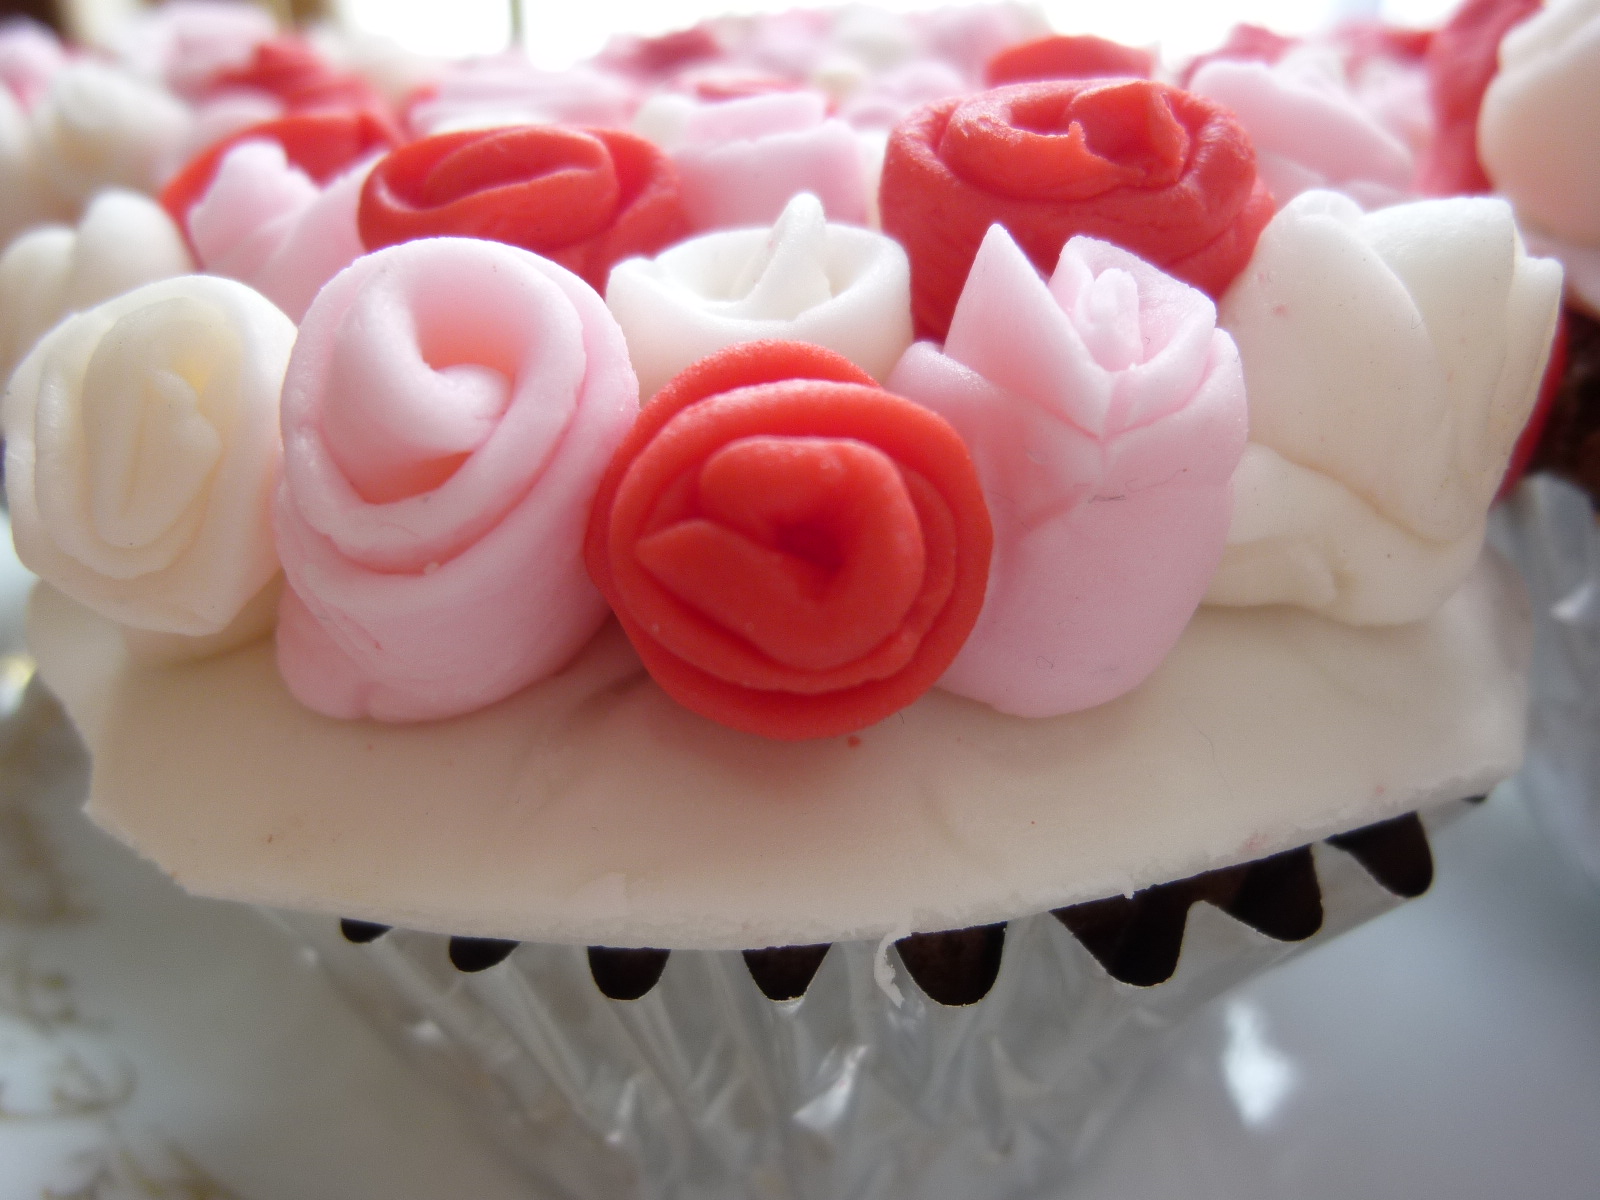
- Unwrap one of your base circles. Dip your paint brush in the shortening, lightly brush the fondant circle, then adhere the roses to it.
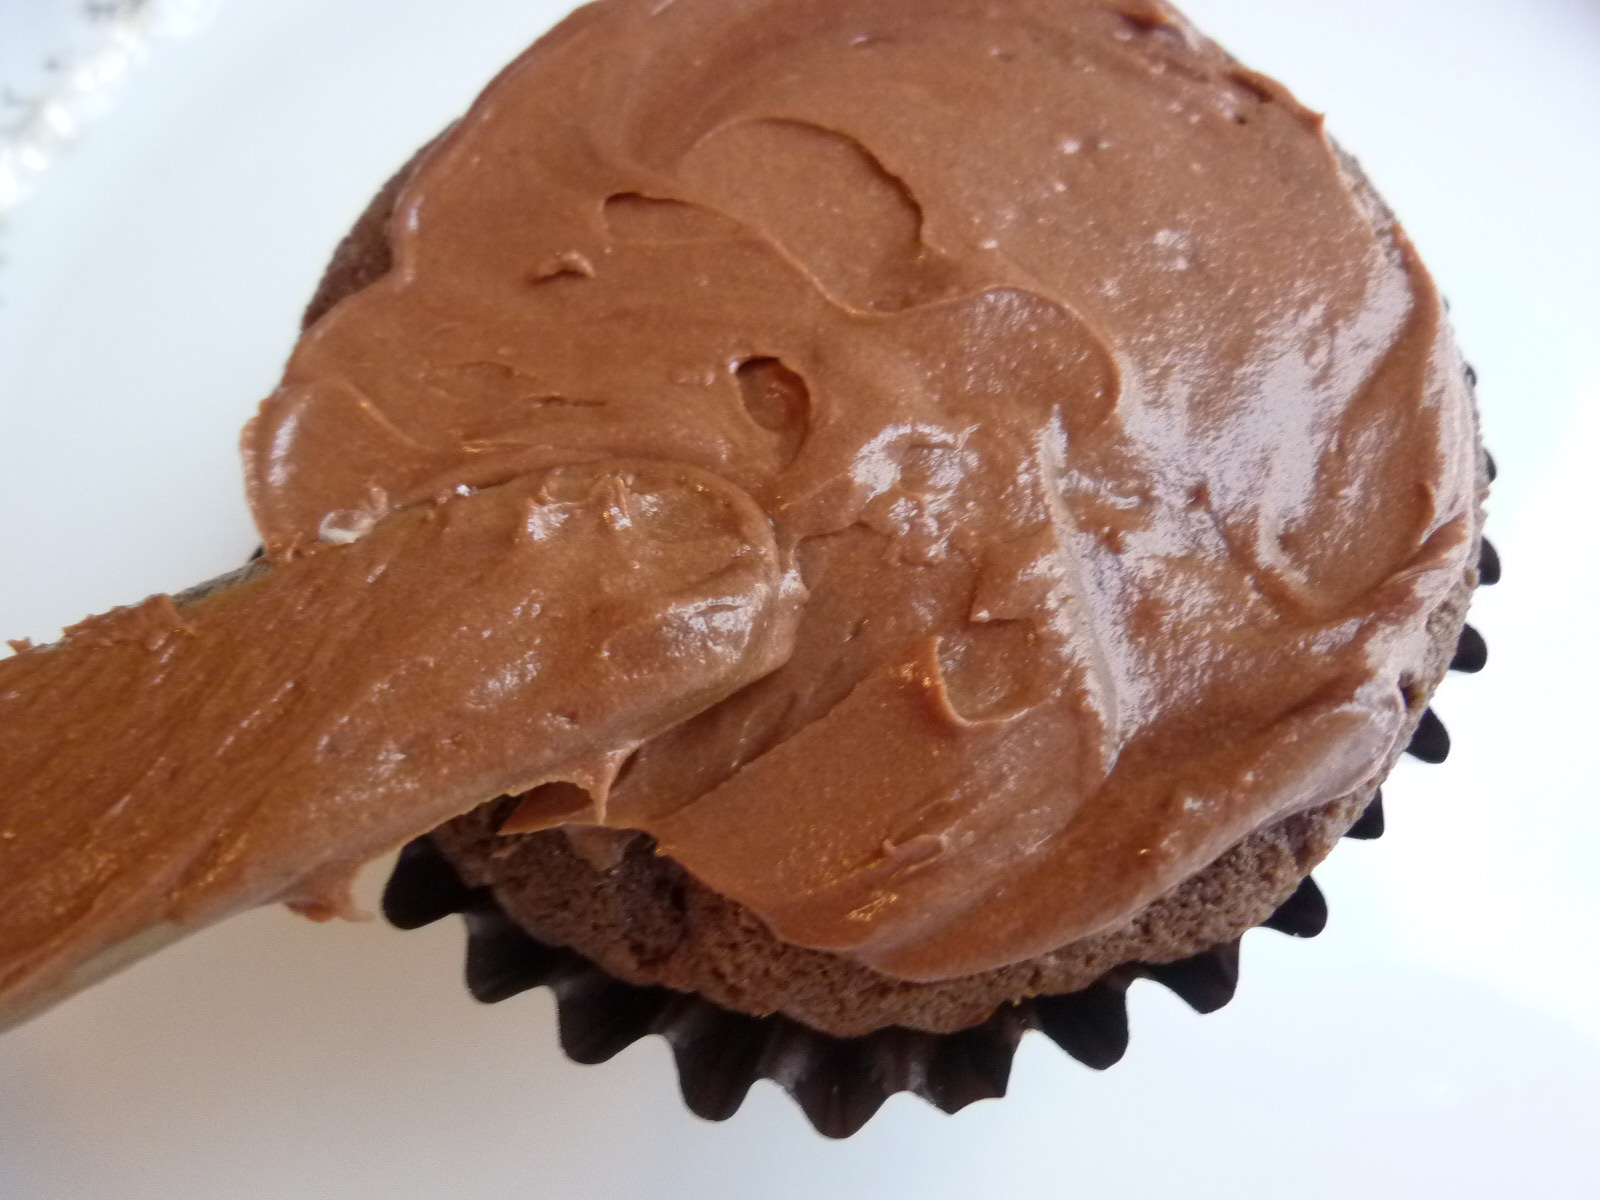
- Uncover the cupcake frosting, smear a thin layer of icing on the cupcake.
- With a small spatula gently lift the fondant circle with the rosebuds and adhere it to the cupcake.
- I scattered edible pearls on as an added touch. You can also brush them with disco, hologram or luster dust if you want a little sparkle.

Probably no human being wants to eat this much fondant. Just take the top off and eat what’s underneath.
HAPPY VALENTINE’S DAY!
7 comments
Very sweet and pretty, haha I think it's so funny that you go to so much effort and then say to lift them off to eat. I do the same thing exactly although only with shop bought, I do like the taste of marshmallow fondant.
These are stunning! So pretty with all that tender loving care you put into making each one! Thanks for telling us how you did it.
Your fondant rosebuds are exquisite! What a gift and treat for the people who were presented with these beautiful cupcakes. =)
I'm SO glad to have found your recipe for fondant. My daughters made "papi" a chocolate cake for Valentine's day; however, our fondant was probably too old and hard. They wanted to make flowers like this. Now we can try again….. good thing there is a four day weekend coming up!
They are gorgeous but yes they do look like they are very labour intensive-but worth it from the eater's point of view! 😀
I also need/want to tackle marshmallow fondant. These are so cute! Also, Magnolia's chocolate buttercream is my absolute favorite. I could eat it just by itself.
These are so cute. 2 things that I need to conquer in the next couple of months-fondant and macarons. U are definitely an inspiration. i want to try marshmallow fondant because I don't like the taste of regular fondant. I've heard so many good things about marshmallow fondant.